Overview
PowerUX’s AI-Generated Flows feature allows you to create sophisticated UX flows using natural language descriptions. Simply describe what you want your flow to do in plain English, and our generative AI will create the complete flow with all the necessary action steps, logic, and configurations.Powered by Generative AI This feature uses advanced AI to understand your requirements and generate production-ready flows. No coding or technical knowledge required!
Why Use AI-Generated Flows?
Speed
Create complex flows in seconds instead of minutes or hours
Simplicity
Describe what you want in plain language - no technical expertise needed
Accuracy
AI understands context and generates flows with proper logic and structure
Learning Tool
See how AI implements your requirements and learn PowerUX best practices
Getting Started with AI Flows
Step 1: Start Creating a Flow
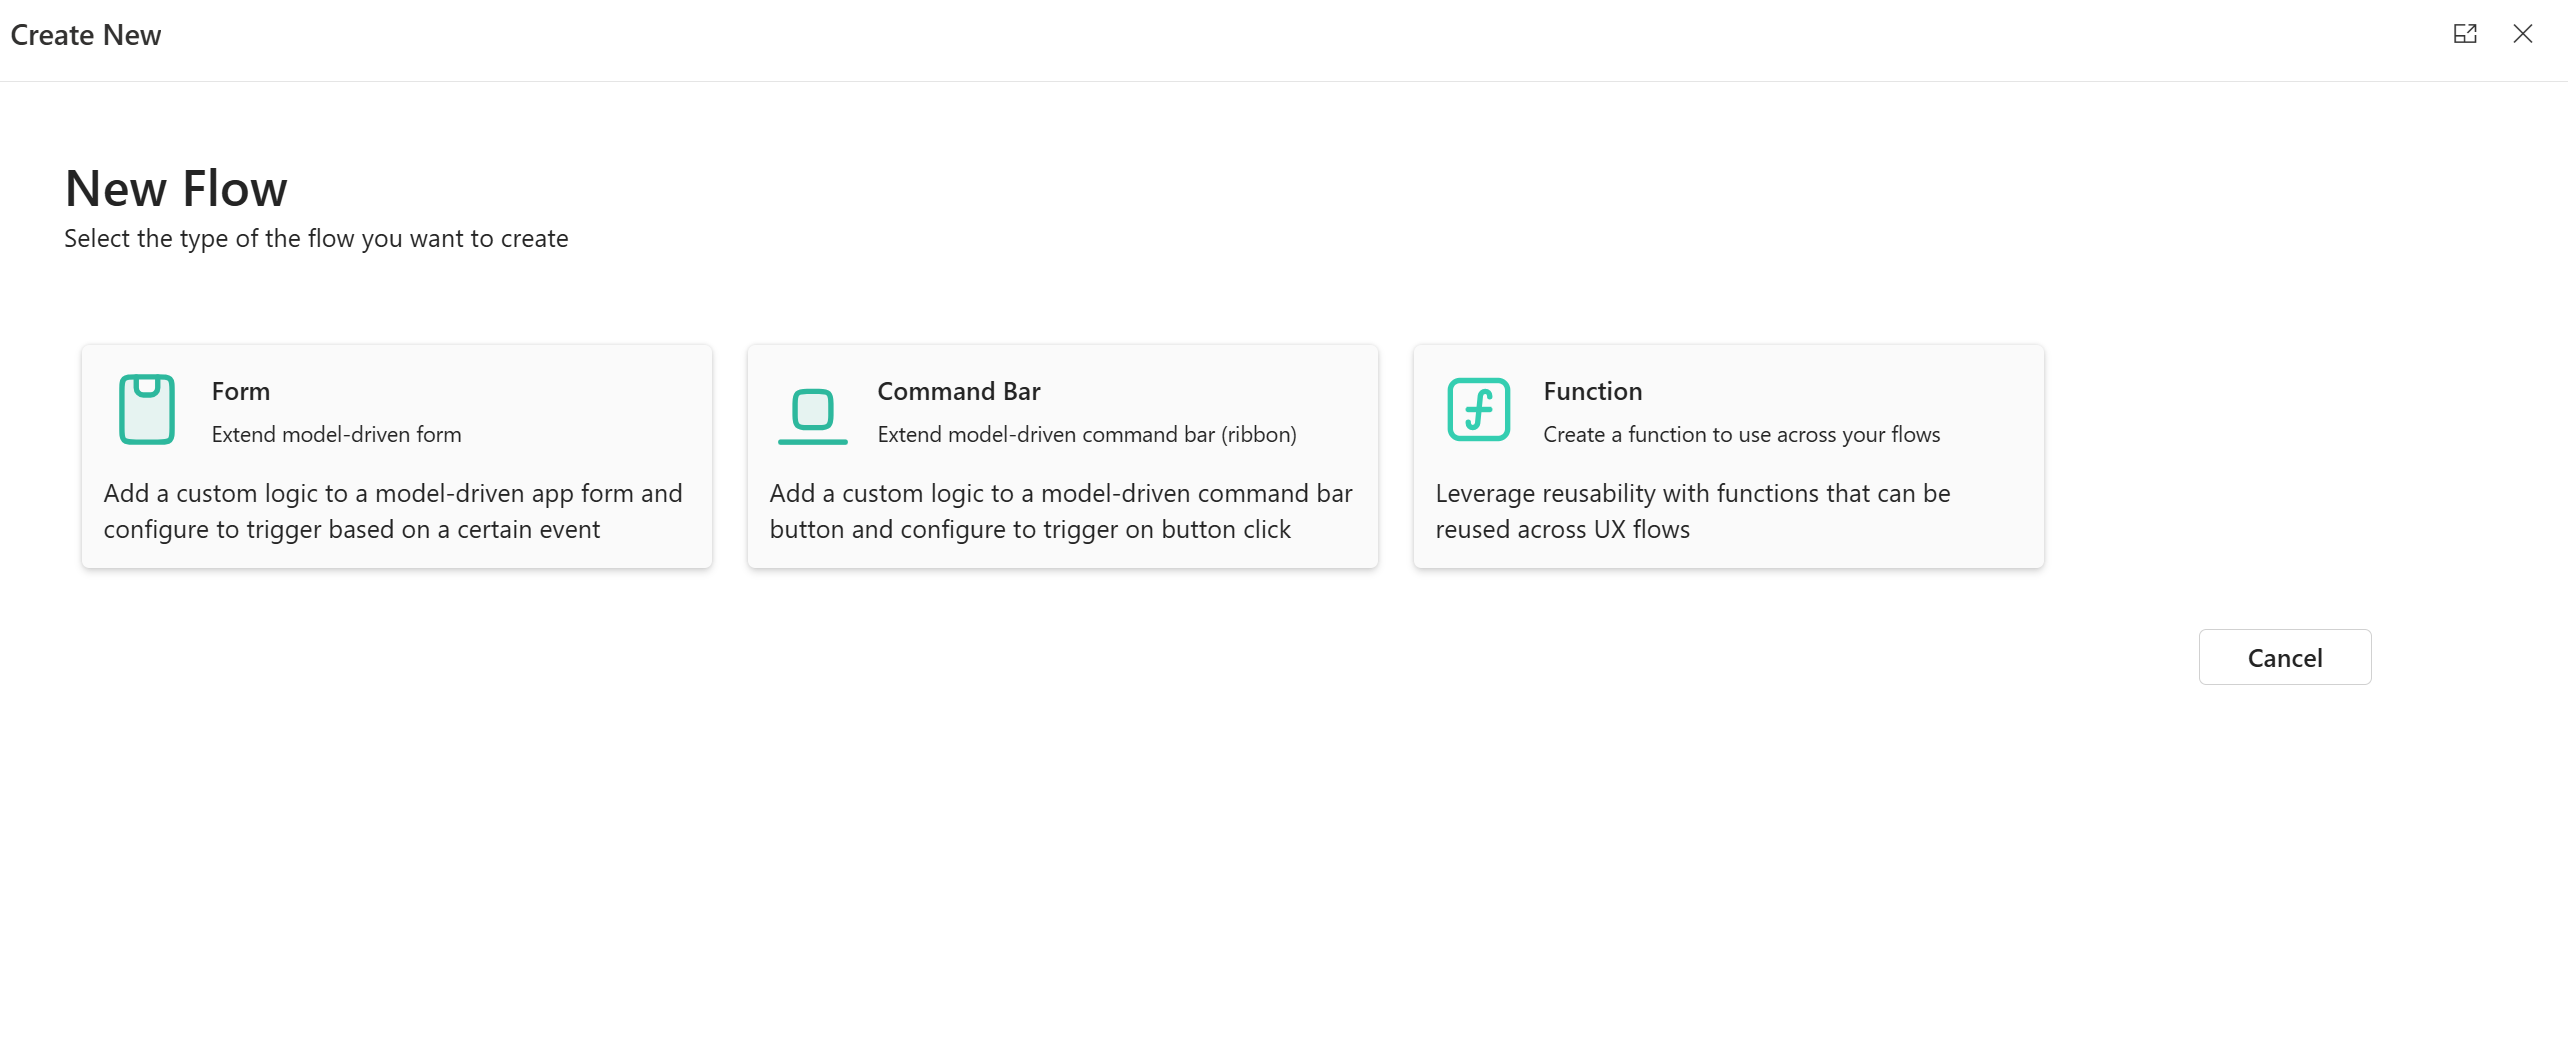
From the UX Flows list, click + New Flow to open the flow creation dialog.Step 2: Select Flow Type
Choose the type of flow you want to create:- Form - For model-driven app forms
- Command Bar - For ribbon buttons
- Function - For reusable functions
Step 3: Choose “Create with AI”
In the flow properties screen, you’ll see several options. Click on Create with AI - the first option with the sparkles icon.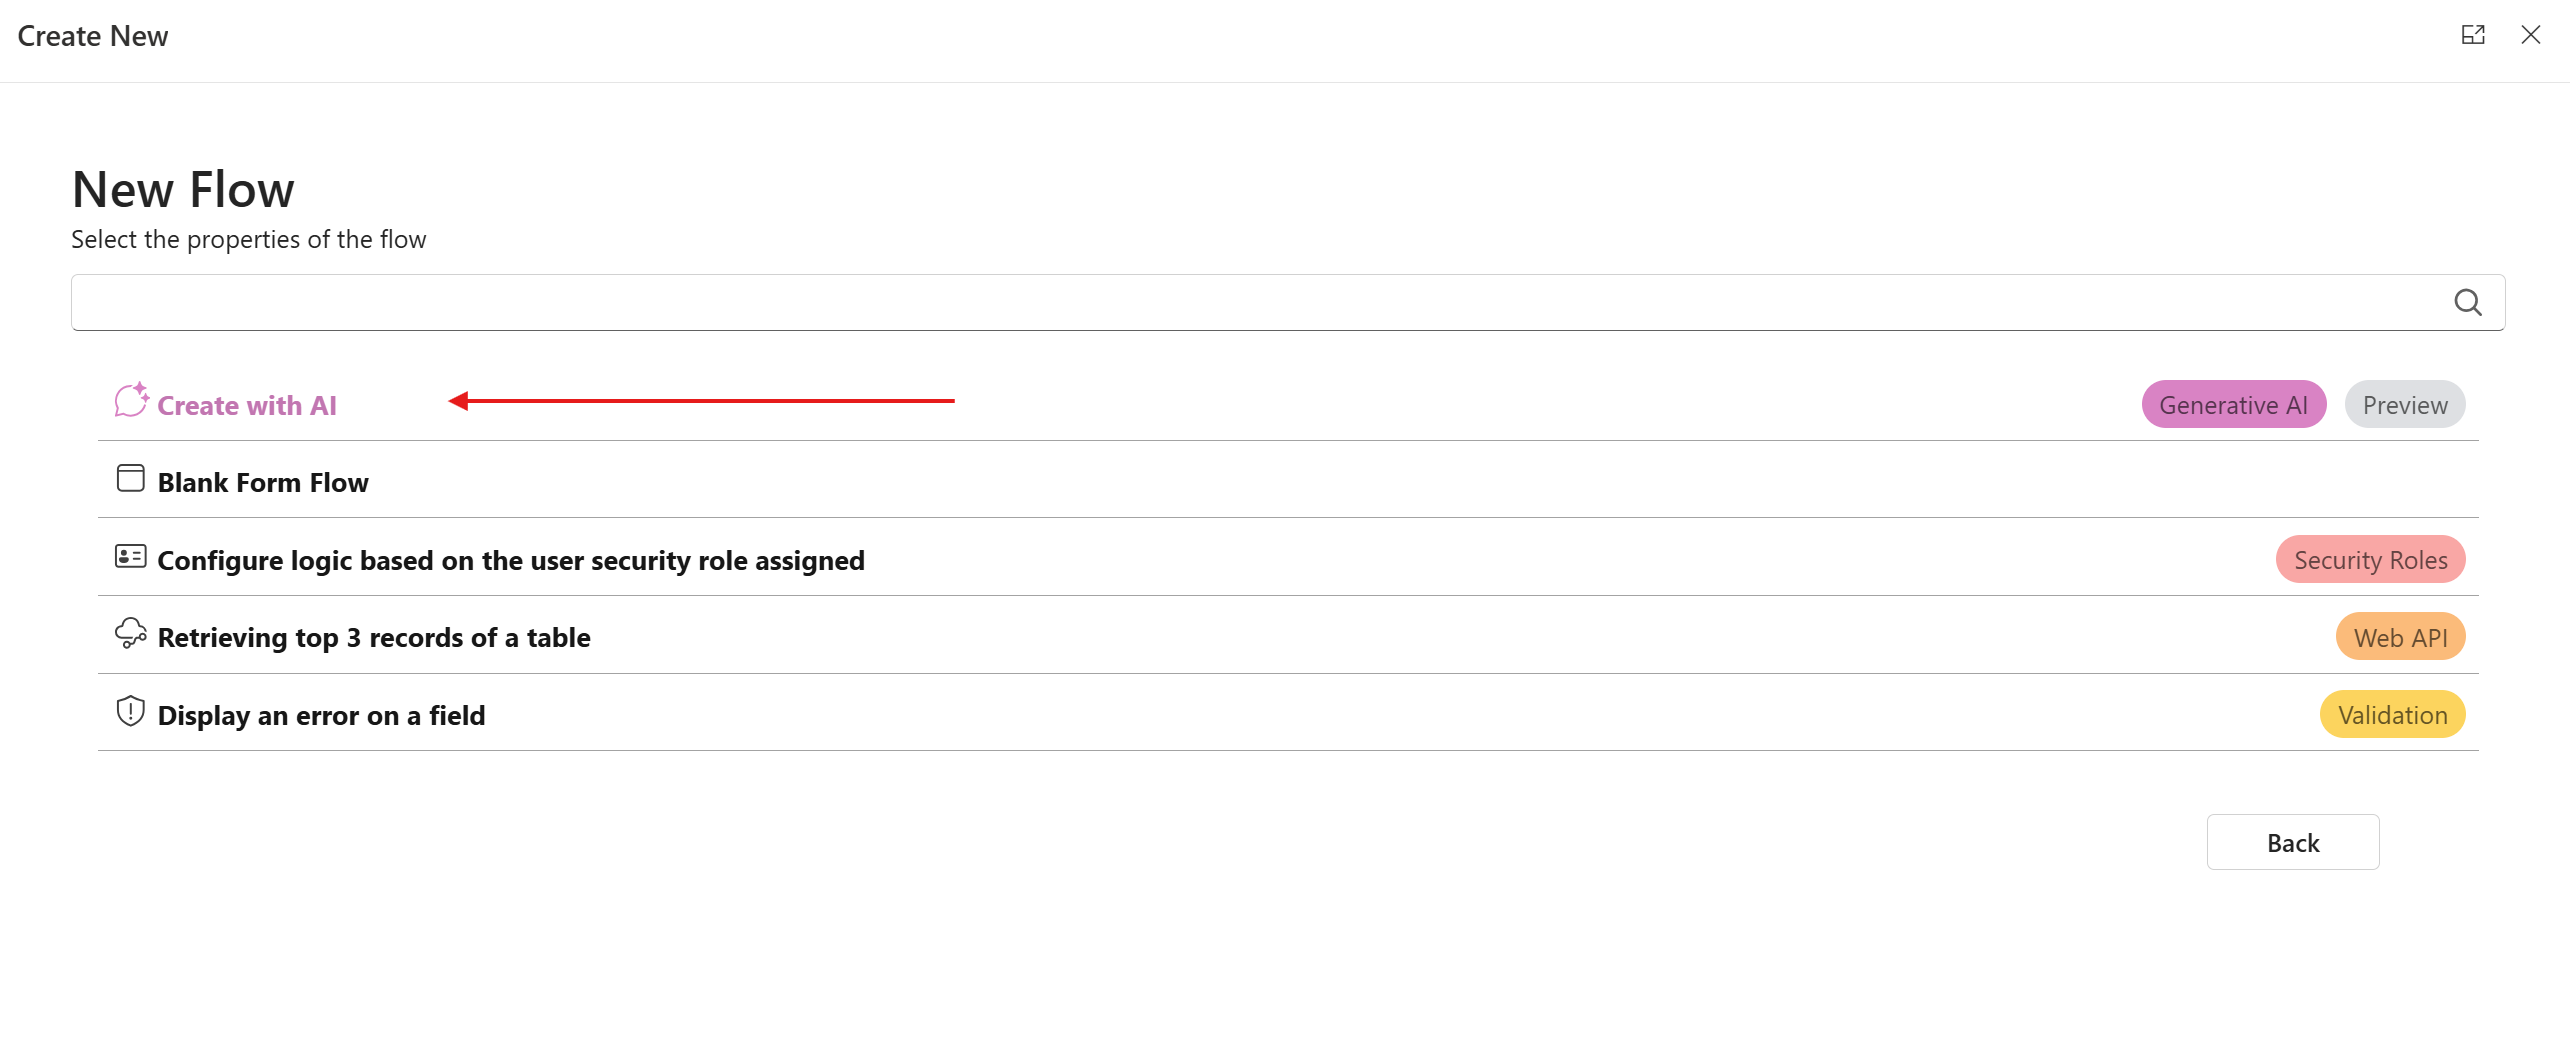
Step 4: Describe Your Flow
A text area will appear asking you to “Describe Your Flow in Plain Text”. This is where the magic happens!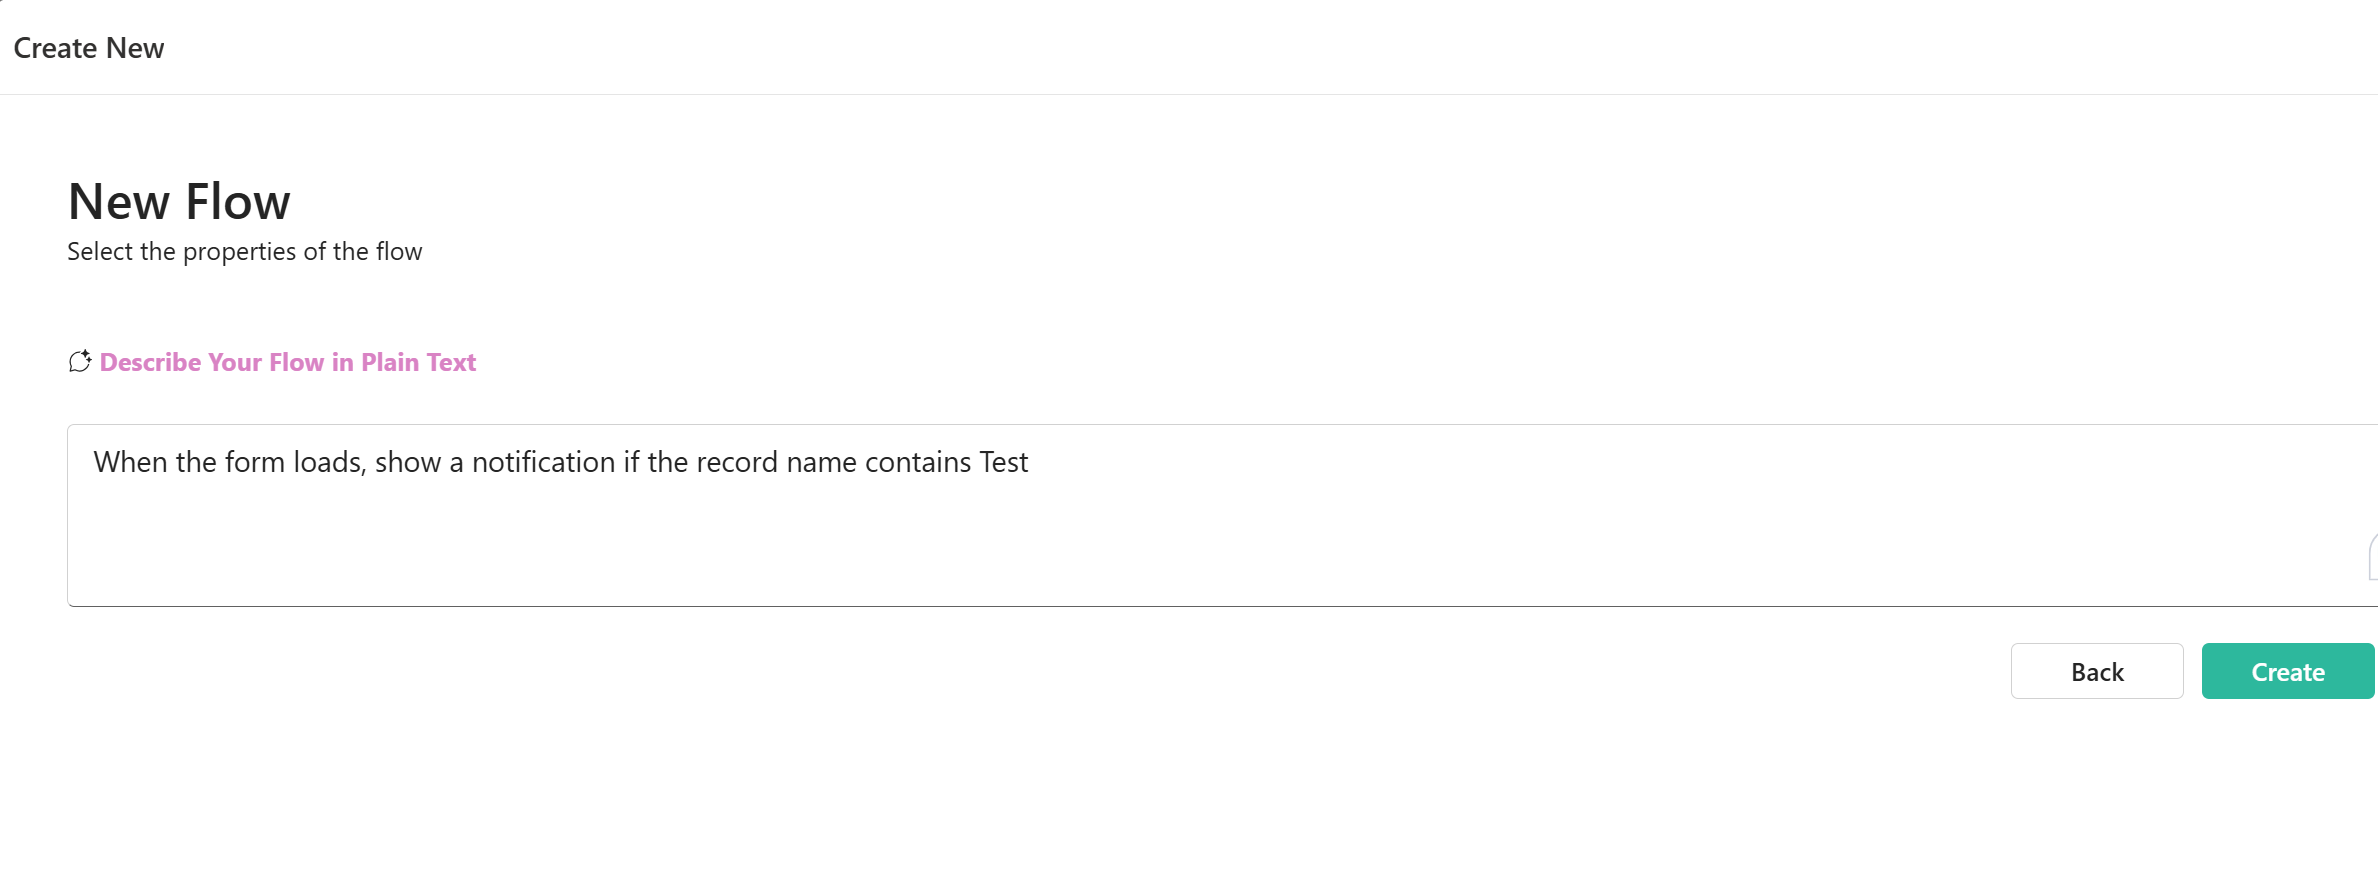
Be specific about:
- When it should happen (trigger)
- What it should do (actions)
- Conditions if any (logic)
Step 5: Configure Flow Properties
After describing your flow, set the standard flow properties:A descriptive name for your flow
Brief description of what the flow does (optional but recommended)
Select the table this flow operates on
Select the form for this flow (for Form flows)
Step 6: Create Your Flow
Click the Create button. PowerUX AI will:- Analyze your natural language description
- Determine the required action steps
- Configure the proper logic and conditions
- Generate a complete, ready-to-use flow
Your AI-generated flow opens in the flow builder, ready to review, modify, or publish!
Writing Effective AI Prompts
The quality of your AI-generated flow depends on how clearly you describe your requirements. Follow these best practices:Be Specific About Triggers
Good Trigger Descriptions
Good Trigger Descriptions
- “When the form loads”
- “When the user clicks the Save button”
- “When the Status field changes”
- “On form load, after data is loaded”
Avoid Vague Triggers
Avoid Vague Triggers
- “Sometimes do this”
- “When needed”
- “Usually when…”
Describe Clear Actions
Good Action Descriptions
Good Action Descriptions
- “Show a notification with the message ‘Record saved successfully’”
- “Hide the Credit Limit field”
- “Set the Status field to ‘Active’”
Avoid Ambiguous Actions
Avoid Ambiguous Actions
- “Do something with the field”
- “Update stuff”
- “Handle the record”
Include Conditions Clearly
Good Condition Descriptions
Good Condition Descriptions
- “If the Account Type equals ‘Enterprise’”
- “When the record name contains ‘Test’”
- “If the Annual Revenue is greater than 1000000”
- “When the Status is not ‘Active’ and Priority is ‘High’”
Avoid Unclear Conditions
Avoid Unclear Conditions
- “If it’s the right type”
- “When appropriate”
- “If needed”
Example AI Prompts
Simple Notification
Prompt:- Form OnLoad trigger
- Condition checking if Name contains “Test”
- Form notification action with an appropriate message
Field Visibility Control
Prompt:- Field OnChange trigger for Account Type
- Branching condition based on field value
- Show/Hide control actions for Credit Limit field
Data Validation
Prompt:- Form OnSave trigger
- Email validation logic
- Error display on field
- Cancel save action if invalid
Automated Record Creation
Prompt:- Form OnSave trigger
- Condition checking Status change
- Create Record action with proper field mappings
- Success notification
Complex Business Logic
Prompt:- Form OnLoad trigger
- Multiple branching conditions based on user roles
- Field visibility controls for each scenario
- Form mode changes
- Conditional notifications
Advanced AI Prompt Techniques
Use Context from Multiple Fields
Prompt:Specify Complex Workflows
Prompt:Reviewing and Refining AI-Generated Flows
After AI generates your flow:Tips for Best Results
Start Simple, Then Iterate
Start Simple, Then Iterate
Begin with a basic description and let AI create the flow. Then, if needed, create a new version with more details.
Use Field Names Correctly
Use Field Names Correctly
Reference fields by their display names as they appear in the form (e.g., “Account Name” not “accountname”).
Be Sequential
Be Sequential
If you have multiple actions, describe them in the order they should occur. Use numbered lists when helpful.
Specify User Experience
Specify User Experience
Describe the user experience you want: “show a notification”, “display an error”, “prompt for confirmation”.
Common Use Cases
Conditional Field Visibility
Dynamic Field Requirements
Calculated Fields
User Notifications
Record Status Management
Troubleshooting
Flow doesn't do what I expected
Flow doesn't do what I expected
Solution: Review the generated flow in the builder. The AI might have interpreted your description differently. Modify the action steps or try rephrasing your description.
Some fields are not found
Some fields are not found
Solution: Ensure you’re using the exact display names of fields as they appear in your form. Check spelling and capitalization.
Logic is too simple or too complex
Logic is too simple or too complex
Solution: Adjust the detail level in your description. More detail = more complex flows. Less detail = simpler flows.
Need to combine multiple scenarios
Need to combine multiple scenarios
Solution: Either describe all scenarios in one prompt, or create separate flows for each scenario and combine them manually.
Comparing AI vs Manual Creation
Create with AI
Best For:
- Quick prototyping
- Common scenarios
- Learning PowerUX
- Time-sensitive projects
Manual Creation
Best For:
- Very specific requirements
- Complex custom logic
- Edge case handling
- Fine-tuned optimization
AI Generation Limits
Current LimitationsWhile our AI is powerful, be aware of these current limitations:
- Complex multi-branch logic may need manual refinement
- Very specific custom requirements might need manual implementation
- Integration with external systems may require additional configuration
- Some advanced scenarios are better built manually
Privacy and Data
Your Data is SafeWhen you use AI-generated flows:
- Your natural language descriptions are processed securely
- No sensitive data from your environment is stored
- AI learns from patterns, not your specific data
- All standard PowerUX privacy policies apply
Best Practices Summary
Do This:
- ✅ Write clear, specific descriptions
- ✅ Use proper field names
- ✅ Mention triggers explicitly
- ✅ Describe desired user experience
- ✅ Review and refine as needed
- ❌ Vague or ambiguous descriptions
- ❌ Assuming AI knows your custom fields
- ❌ Overly complex single prompts
- ❌ Expecting perfection without review
- ❌ Using technical jargon unnecessarily
Related Resources
Reusable Functions
Create reusable logic that can be used across flows
Action Steps
Learn about all available action steps
Triggers
Understand when flows execute
FAQs
How accurate is the AI?
How accurate is the AI?
The AI is highly accurate for common scenarios and well-described requirements. For best results, provide clear, specific descriptions. You can always review and modify the generated flow.
Can I edit AI-generated flows?
Can I edit AI-generated flows?
Absolutely! AI-generated flows are fully editable. Use AI to create the structure, then refine manually to perfect your flow.
What if the AI doesn't understand my description?
What if the AI doesn't understand my description?
Try rephrasing your description with more detail or simpler language. Break complex requirements into smaller, clearer statements.
Is there a cost for using AI generation?
Is there a cost for using AI generation?
AI generation is included with your PowerUX subscription. Check your plan details for any usage limits.
Can AI create Functions too?
Can AI create Functions too?
Yes! The AI generation feature works with Forms, Command Bars, and Functions. Just select Function as the flow type.
Get Started Now
Ready to create your first AI-generated flow?Try AI Flow Generation
Click New Flow → Choose Create with AI → Describe what you want → Create!