Overview
Reusable Functions in PowerUX allow you to create modular, reusable UX flows that can be leveraged across multiple forms and command bars in your model-driven applications. This powerful feature promotes code reusability, maintains consistency, and simplifies maintenance of your business logic.Key Benefits
- Create once, use anywhere across your flows
- Maintain consistency across your application
- Simplify updates by editing in one place
- Reduce development time
Creating a Reusable Function
Follow these steps to create a reusable function in PowerUX:Step 1: Navigate to UX Flows
From your PowerUX interface, navigate to the UX Flows section where you can see all your existing flows.Step 2: Click on New Flow
Click the New Flow button in the toolbar to start creating a new flow.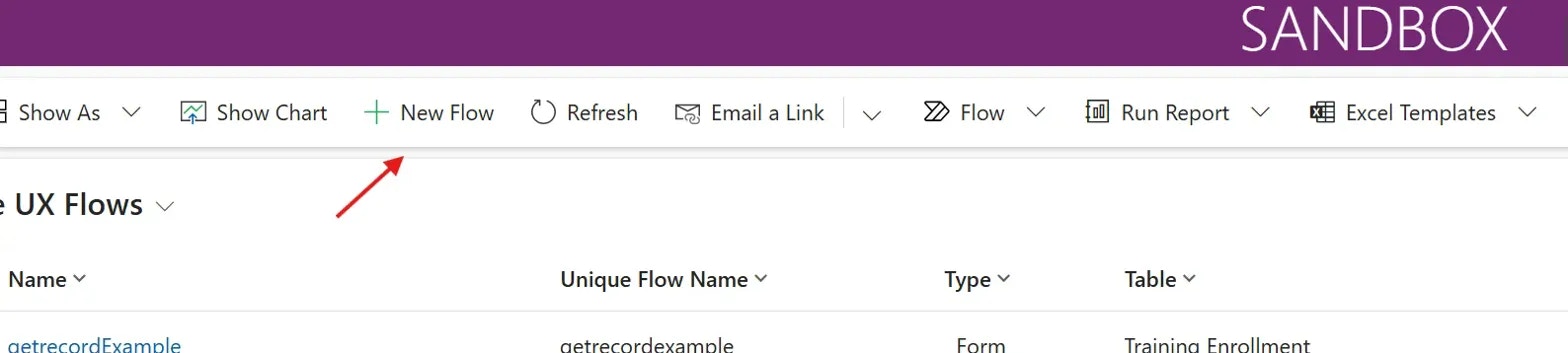
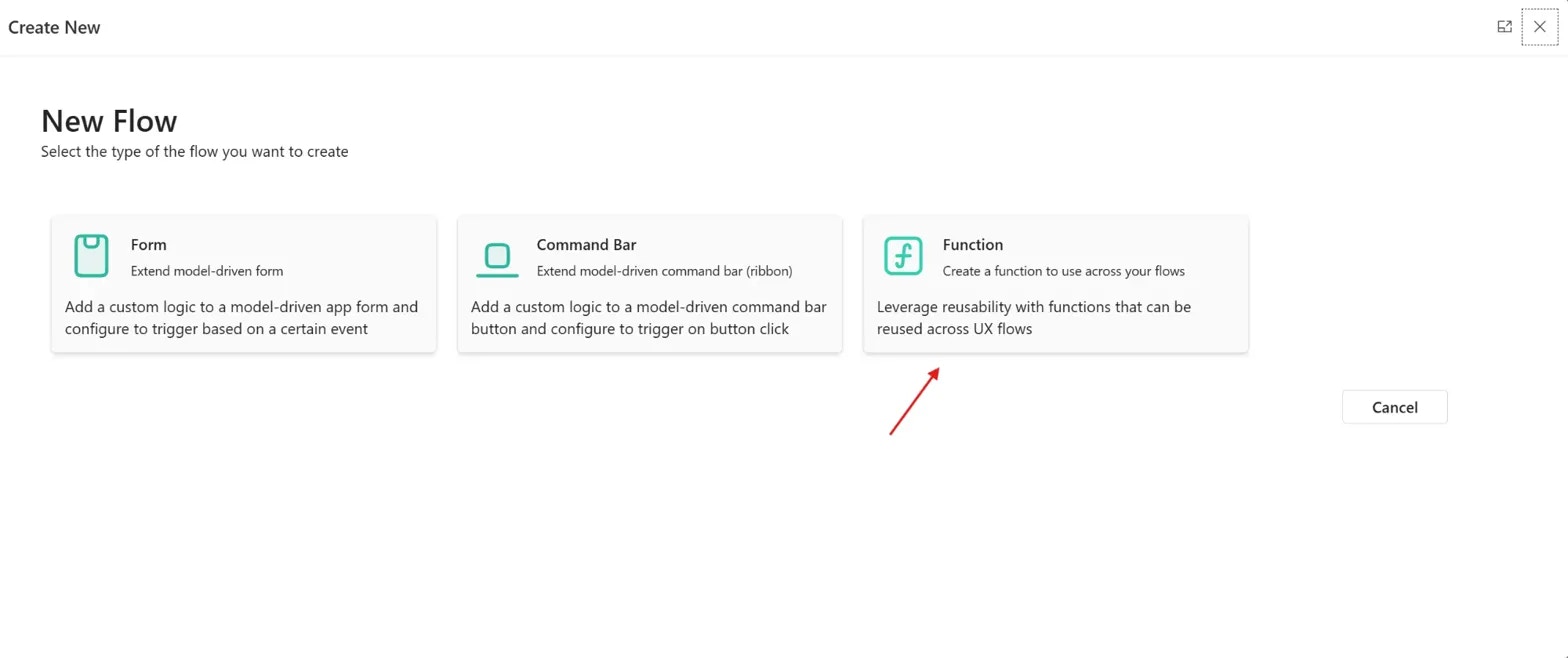
Step 3: Select Function Type
In the New Flow window, you’ll see three flow types:- Form - Extend model-driven form
- Command Bar - Extend model-driven command bar (ribbon)
- Function - Create a function to use across your flows
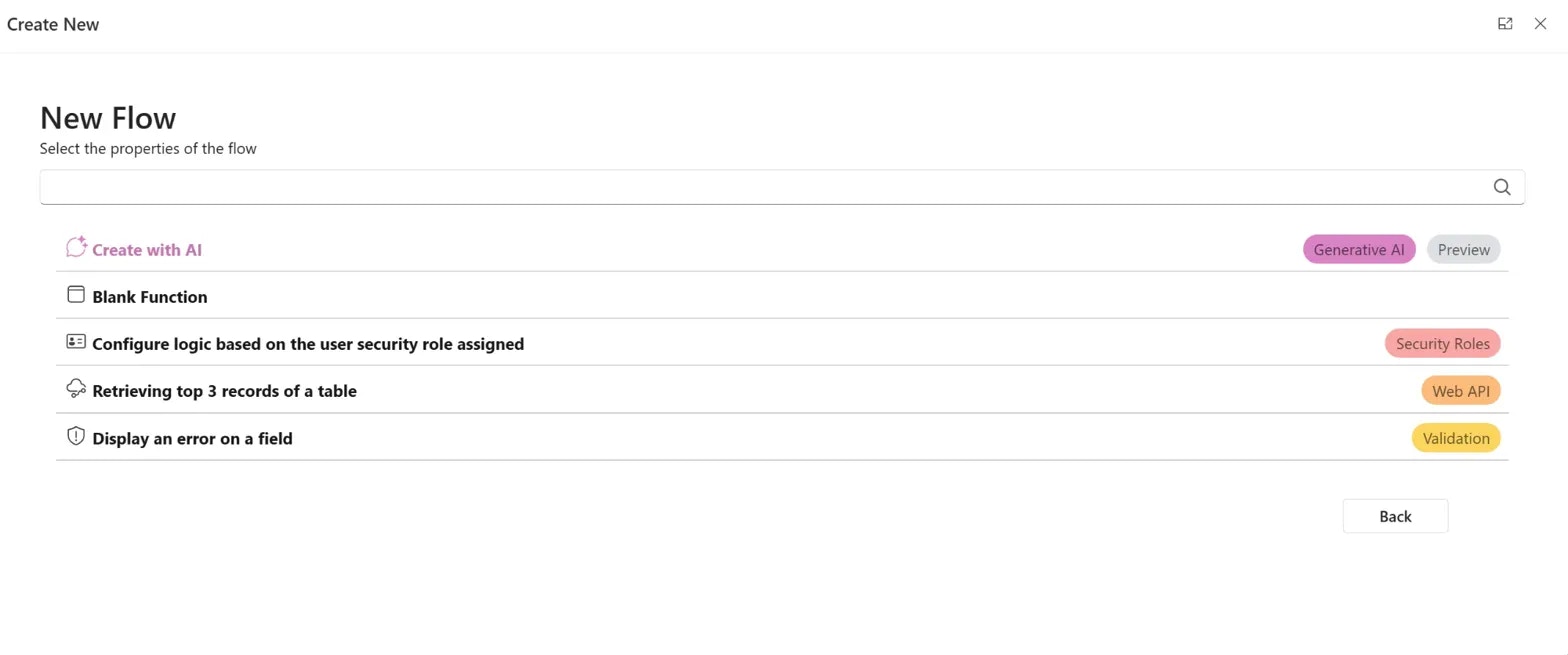
Step 4: Choose Creation Method
PowerUX offers three ways to create your function:Create with AI
Use natural language to describe your function and let AI generate it for you
Use a Template
Start with pre-built templates for common scenarios
Blank Function
Start from scratch with a blank function
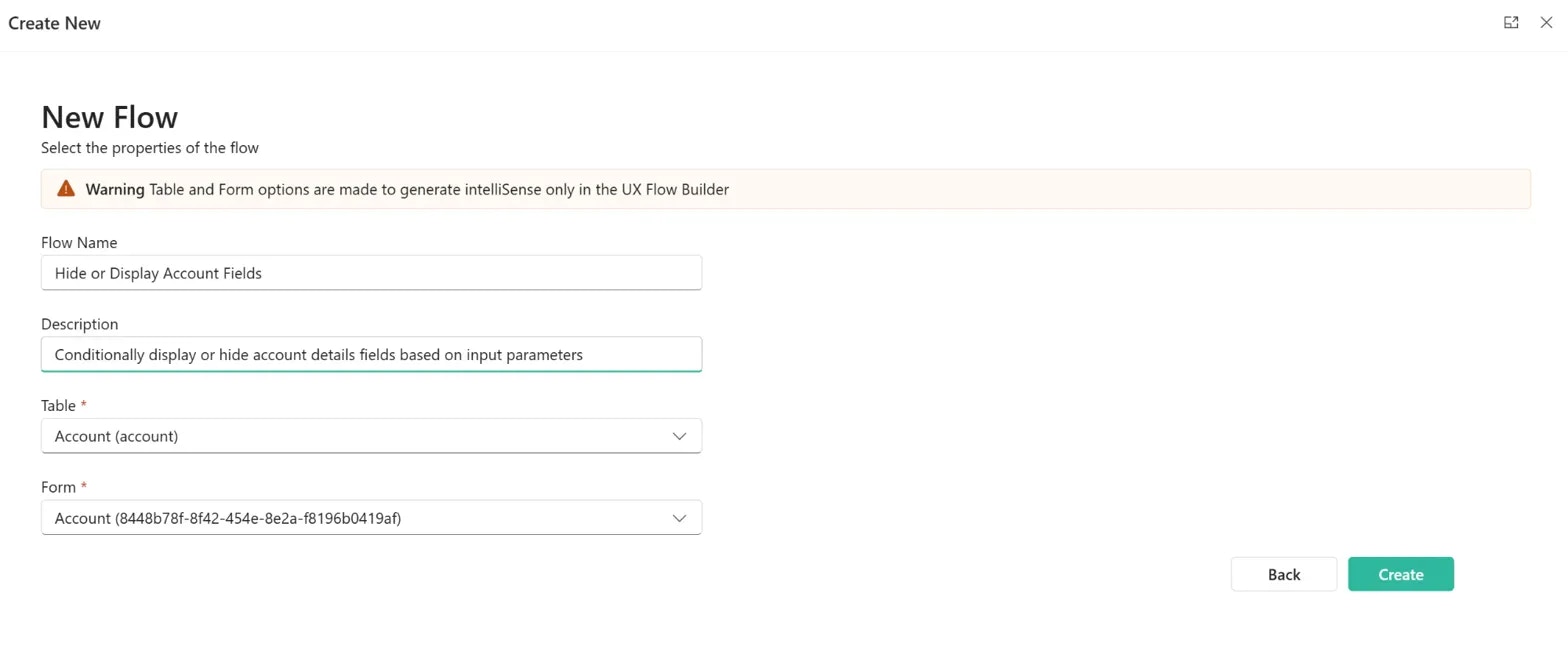
Step 5: Set Creation Parameters
Configure your function parameters:A descriptive name for your function (e.g., “Hide or Display Account Fields”)
A brief description of what the function does (e.g., “Conditionally display or hide account details fields based on input parameters”)
Select the table this function will operate on (e.g., Account, Contact)
Select the form associated with this function
Step 6: Create the Function
Click the Create button to generate your function. PowerUX will create the function and open it in the UX Flow Builder.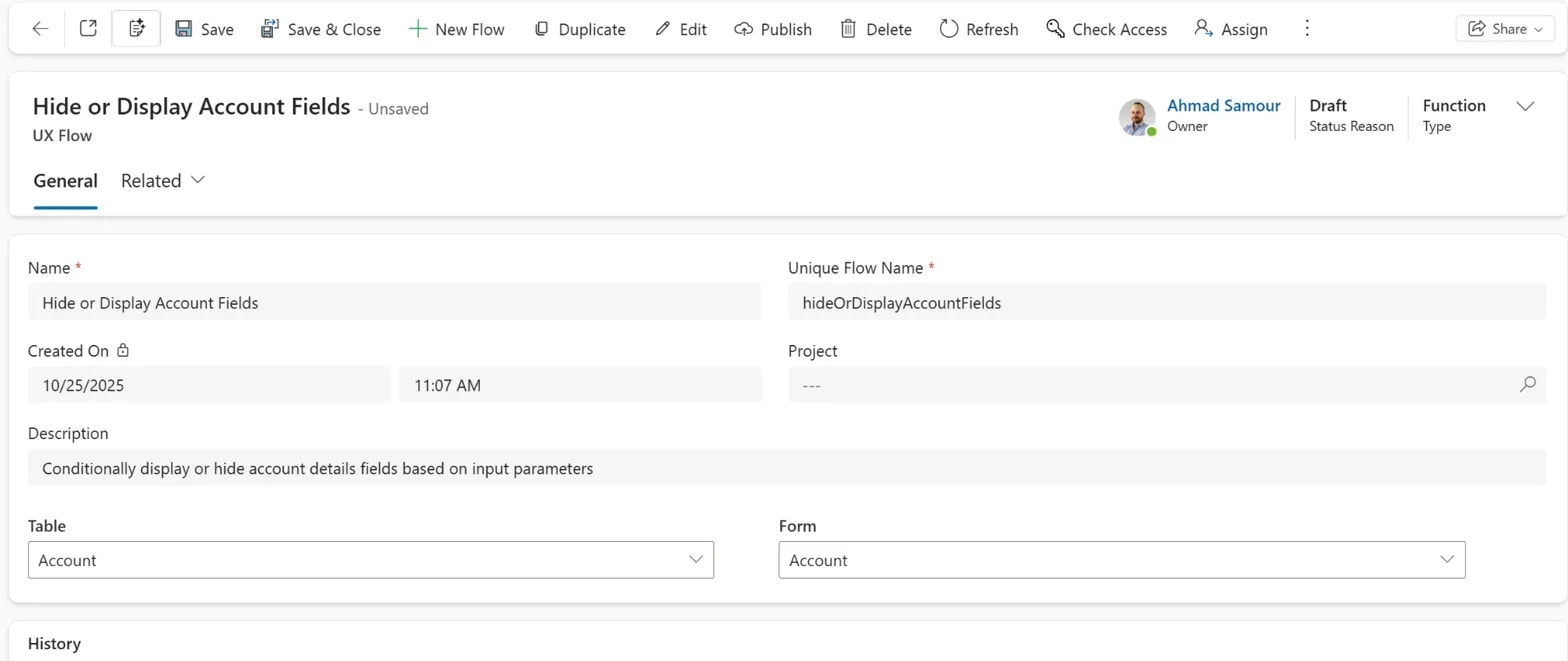
Step 7: Configure The Function’s Parameters
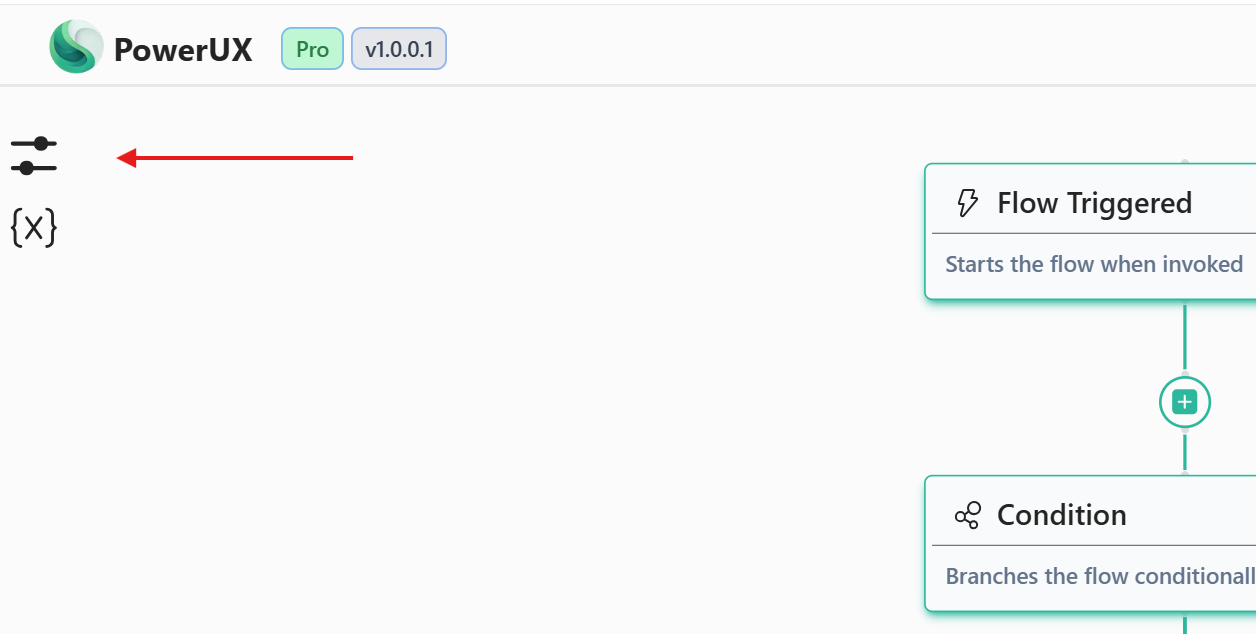
In the UX Flow Builder, parameters in functions are optional, but they help you configure reusable functions with different behavior based on the passed parameters. You’re able to add multiple input parameters and a single output parameter. Follow the steps below in order to configure parameters in your function:- Open the function UX Flow UI Editor
-
Click on Configure Parameters from the top left side
-
To add an input parameter, click on + Input Parameter
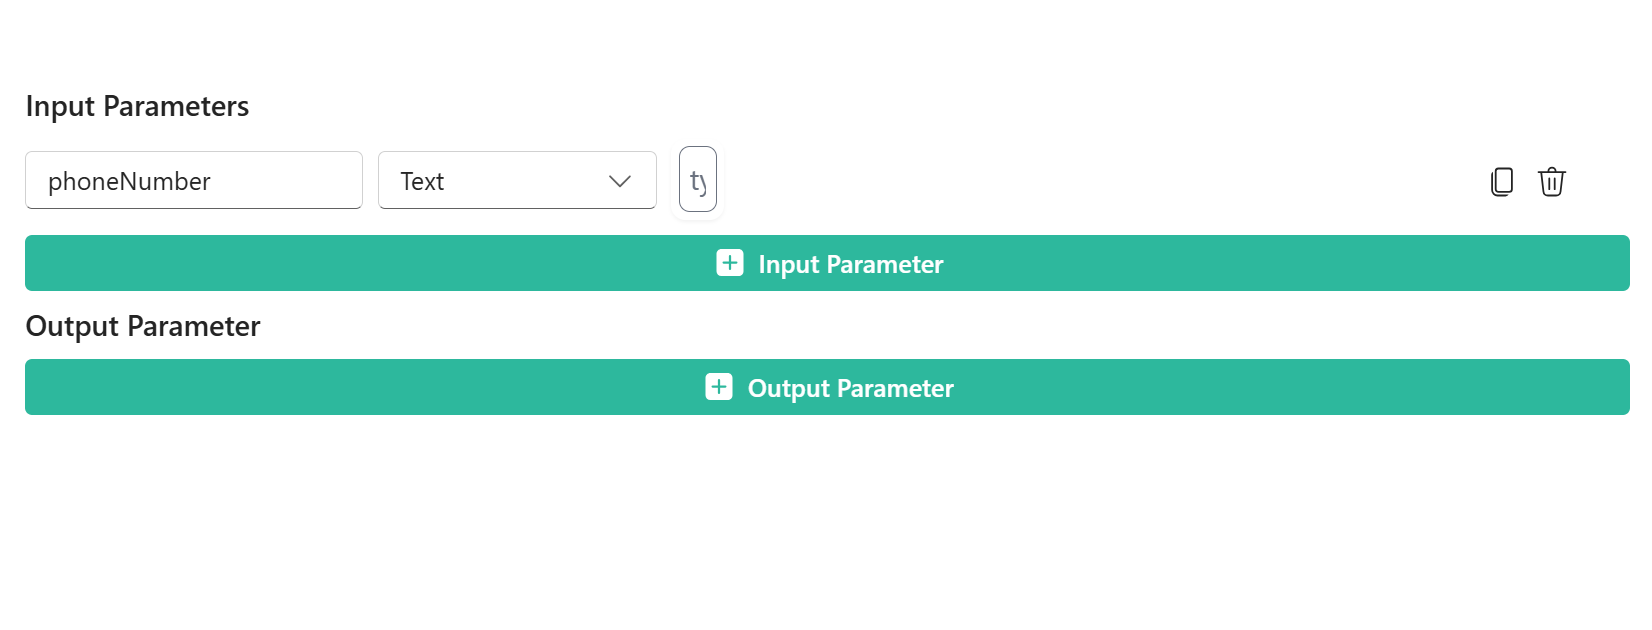
- Choose the name of the parameter and type
- To add an output parameter, click on + Output Parameter
Note: You can have only one output parameter
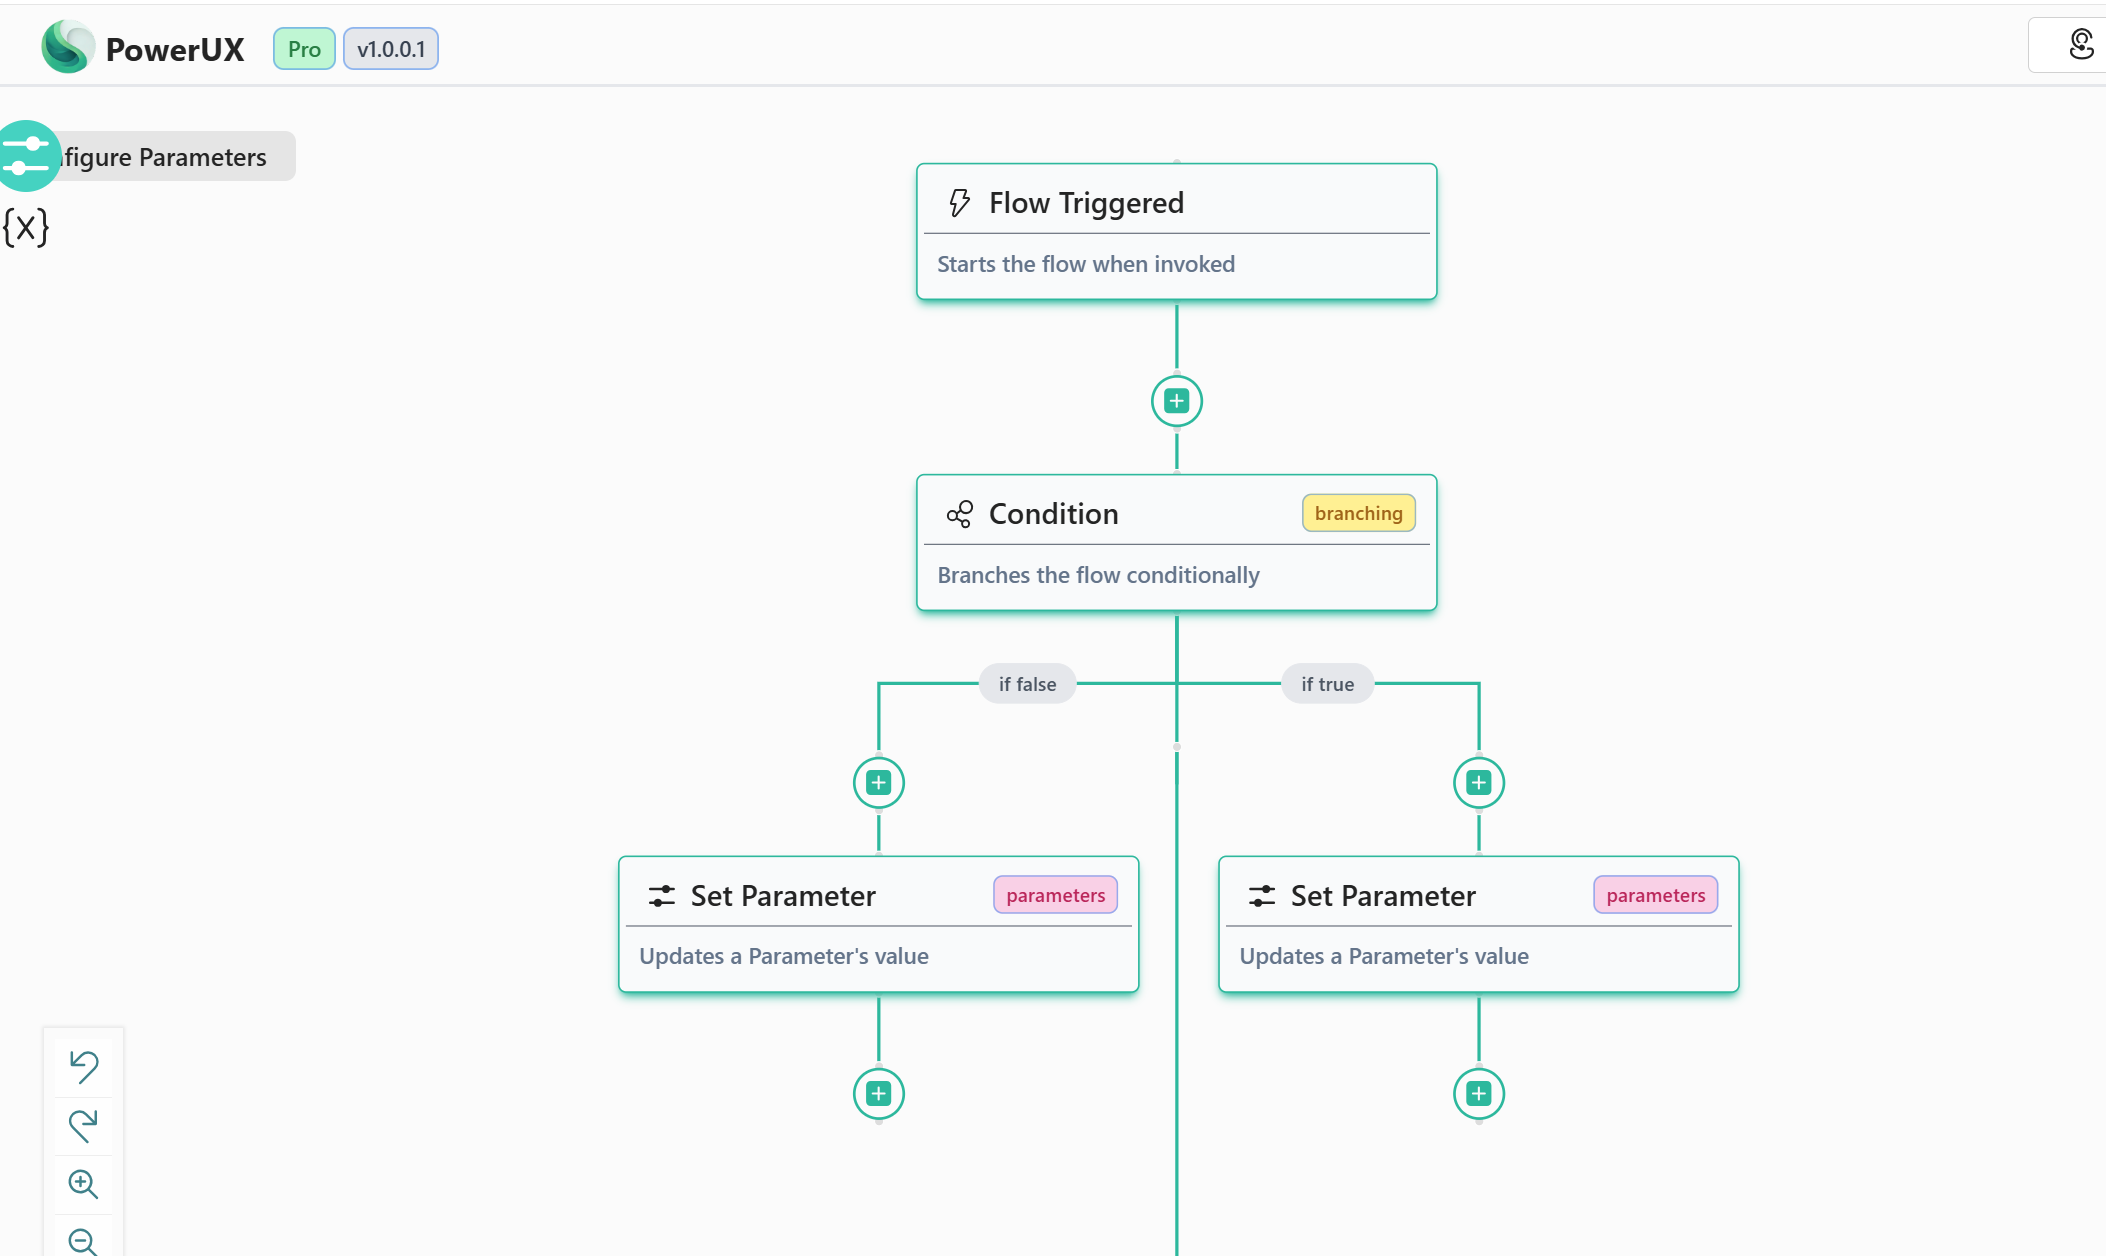
Step 8: Build Your Function Logic
In the UX Flow Builder, add the action steps that define your function’s behavior:- Click the + button to add action steps
- Configure each action step with the appropriate logic
- Use variables, conditional logic, and data operations as needed
- Save your flow
Step 9: Publish Your Function
Once you’re satisfied with your function:- Click the Save button to save your changes
- Click the Publish button to make the function available for use in other flows
Your reusable function is now published and ready to be used across your forms and command bars!
Using a Reusable Function
After creating and publishing your reusable function, you can use it in any Form or Command Bar UX Flow.Step 1: Open Your Target Flow
Navigate to the Form or Command Bar flow where you want to use your function and click Edit.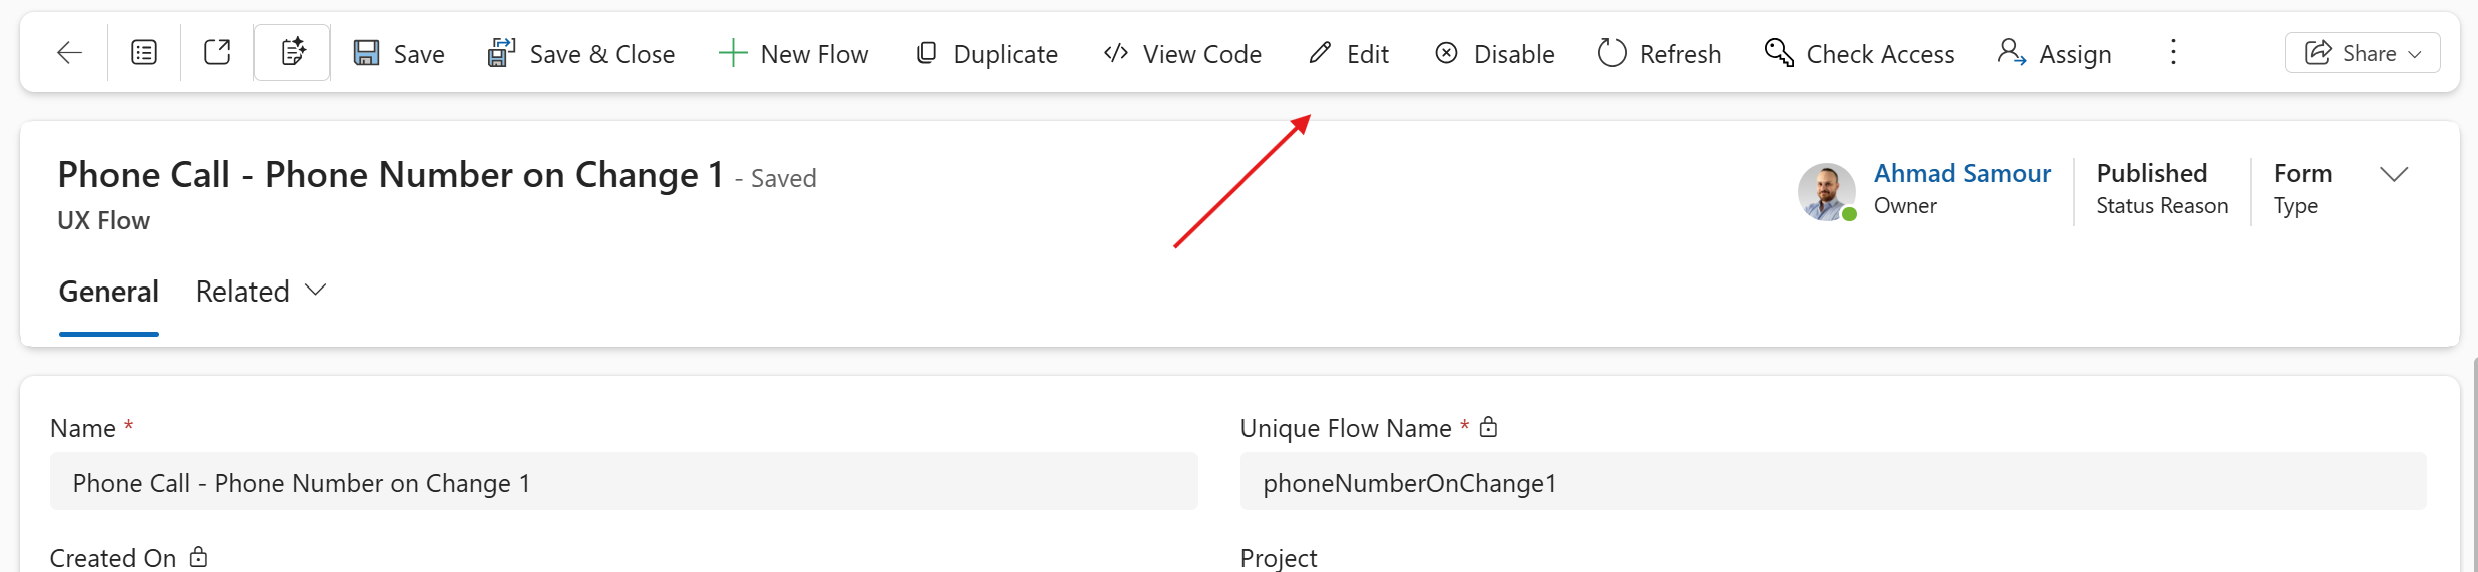
Step 2: Access the UI Editor
In the UX Flow editor, you’ll see the visual flow builder where you can add action steps.Step 3: Add a New Step
Click the + button or click between existing steps to add a new action step.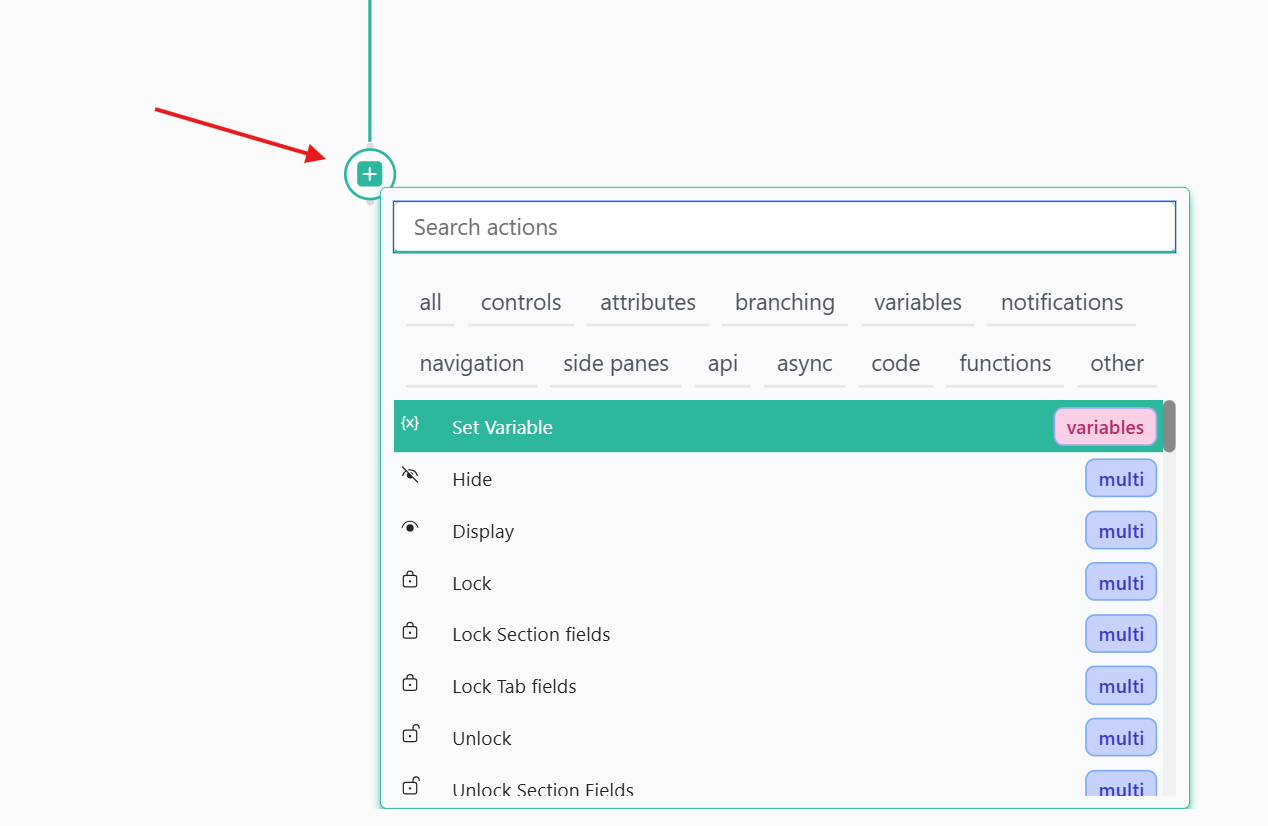
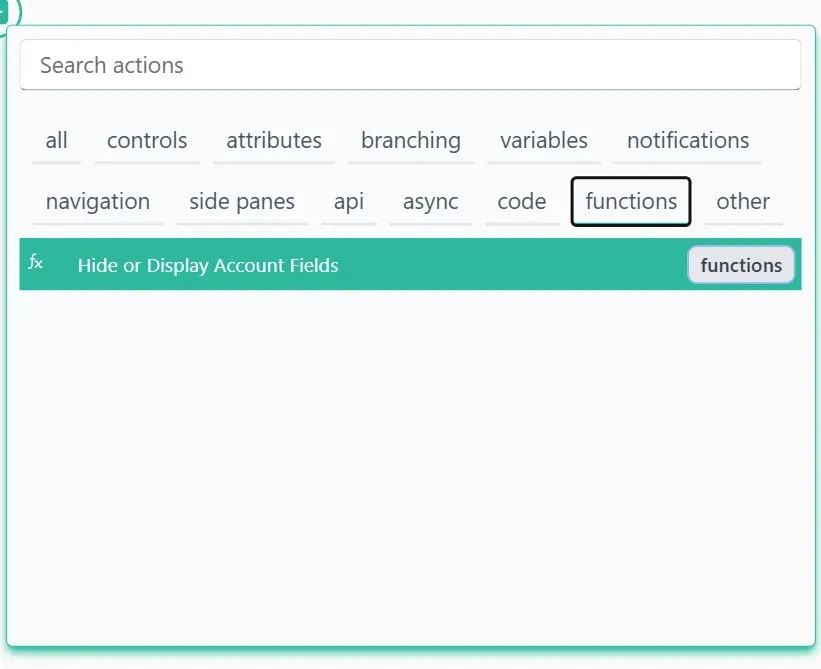
Step 4: Find Your Function
In the action step selector:- Navigate to the functions tab
- Search for your custom function by name
- You’ll see all your published functions listed here
Step 5: Configure and Publish
- Click on your function to add it to the flow
- Configure any input parameters required by the function
- Click Save to save your changes
- Click Publish to deploy your updated flow
Step 6: Observe the Result
Test your flow to ensure the function executes correctly:- Open the form or command bar where you added the function
- Trigger the flow (e.g., on form load, on button click)
- Verify that the function performs as expected
Your reusable function is now integrated into your flow!
Best Practices
Naming Conventions
Naming Conventions
Use clear, descriptive names for your functions that indicate their purpose. For example:
validateAccountDetailshideOrDisplayFieldscalculateTotalAmount
Documentation
Documentation
Always add a meaningful description to your functions. This helps other makers understand the function’s purpose without opening it.
Input Parameters
Input Parameters
Design your functions to accept input parameters for maximum flexibility. This allows you to reuse the same function with different configurations.
Version Control
Version Control
When updating a published function, be mindful that changes will not affect all flows using that function. you need to republish the flows that uses the functions to take effect.
Troubleshooting
Function not appearing in the functions tab
Function not appearing in the functions tab
Make sure you’ve published the function. Only published functions are available for use in other flows.Functions are usable only in non-function UX flows. You can’t use nested functions for now.
Function not executing
Function not executing
Check that the function is properly configured in your flow and that all required parameters are provided.
Changes not reflecting
Changes not reflecting
After modifying a function, remember to publish both the function and any flows using it to see the changes.
Related Resources
Action Steps
Learn about all available action steps you can use in your functions
Triggers
Understand how to trigger your flows and functions
Variables
Work with variables in your functions
AI-Generated Flows
Create functions using natural language with AI